在本教程中,我们将向您展示如何安装 Google Cloud Debian 10 上的 SDK。对于那些不知道的人,谷歌 Cloud SDK 为用户提供访问谷歌的能力 Cloud 通过终端。 它是一个开发工具包,带有多个命令,可帮助管理 Google 内部的资源 Cloud 环境。
本文假设您至少具备 Linux 的基本知识,知道如何使用 shell,最重要的是,您将网站托管在自己的 VPS 上。 安装非常简单,假设您在 root 帐户下运行,如果不是,您可能需要添加 ‘sudo‘ 到命令以获取 root 权限。 我将向您展示 Google 的分步安装 Cloud Debian 10(Buster)上的 SDK。
安装谷歌 Cloud Debian 10 Buster 上的 SDK
第 1 步。在我们安装任何软件之前,重要的是通过运行以下命令确保您的系统是最新的 apt 终端中的命令:
sudo apt update sudo apt upgrade sudo apt install curl apt-transport-https ca-certificates gnupg
步骤 2. 安装谷歌 Cloud Debian 10 上的 SDK。
- 安装谷歌 Cloud 通过 Snap 的 SDK。
运行以下命令安装 Snap 软件包:
sudo apt install snapd sudo snap install core
安装谷歌 Cloud SDK,只需使用以下命令:
sudo snap install google-cloud-sdk --classic
- 安装谷歌 Cloud SDK通过官方源。
现在我们添加 Cloud 通过运行以下命令将 SDK 分发 URI 作为包源:
echo "deb [signed-by=/usr/share/keyrings/cloud.google.gpg] https://packages.cloud.google.com/apt cloud-sdk main" | sudo tee -a /etc/apt/sources.list.d/google-cloud-sdk.list
接下来,导入谷歌 Cloud 通过运行以下命令来获取公钥:
curl https://packages.cloud.google.com/apt/doc/apt-key.gpg | sudo apt-key --keyring /usr/share/keyrings/cloud.google.gpg add -
现在作为最后一步,我们需要安装 Google Cloud 开发工具包:
sudo apt update sudo apt install google-cloud-sdk
完成后,接下来我们运行以下命令来配置 SDK:
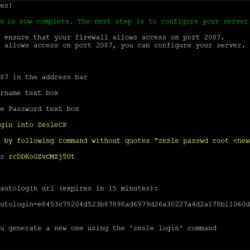
sudo gcloud init
运行上面的命令会提示你授权 Cloud 使用您的 Google 帐户凭据访问 Google 的 SDK 工具 Cloud 并管理它。
Welcome! This command will take you through the configuration of gcloud. Your current configuration has been set to: [default] You can skip diagnostics next time by using the following flag: gcloud init --skip-diagnostics Network diagnostic detects and fixes local network connection issues. Checking network connection...done. Reachability Check passed. Network diagnostic passed (1/1 checks passed). You must log in to continue. Would you like to log in (Y/n)?
恭喜! 您已成功安装 Google Cloud. 感谢您使用本教程安装 Google Cloud Debian 10 Buster 上的 SDK。 如需更多帮助或有用信息,我们建议您查看 官方谷歌 Cloud 网站.